
Chess notation cheat-sheet (for new readers)
Pieces: K king · Q queen · R rook · B bishop · N knight · (a pawn move has no letter)
Actions: x takes · + check · # mate · O-O short castles · O-O-O long castles · e8=Q pawn promotes to queen
Annotations: ! good move · !! brilliant · ? mistake · ?? blunder
What to check first when a pawn-endgame puzzle loads
Before you calculate a single line, run the same three checks on every king-and-pawn position. Whose move is it? Can your king reach a key square in front of the pawn? Do you already hold the opposition, meaning the kings face off with one square between them and it is the other side's turn to move? The answers to those three questions decide most of these puzzles before the pieces start moving.
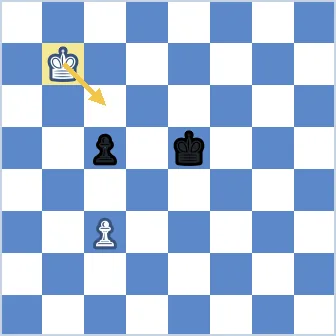
Start with the king, not the pawn. A king that gets to a key square promotes its pawn no matter whose turn it is, so look for the shortest route there first. A non-rook pawn on the 2nd to 4th rank has three key squares; once it reaches the 5th or 6th, the three winning squares sit directly ahead of the pawn and to either side of that square. If your king can step onto one of them without fighting for the opposition, that is usually the fastest win and the move the puzzle wants. Need the fundamentals on how the pawn moves and promotes? Read the pawn's rules, moves and structures to understand what these endings exploit.
Drilling opposition, key squares, and tempo in pawn endgame chess puzzles
The pawn endgame chess puzzles in this set are sorted by the decision you have to make, not by a lecture order, so the same patterns come back until you spot them on sight. When the kings face off, test the opposition: if it is your opponent's move, their king must give way and yours steps toward a key square. Put an odd number of empty squares between the kings on a line and the same logic holds at distance, you just count the gap. With a non-rook pawn, two of three conditions win: king in front of the pawn, opposition held, king on the sixth rank. Reach the sixth ahead of the pawn with the opposition and you push to the seventh without giving check.
Two more patterns appear often enough to drill on their own. Triangulation is the tempo trick: your king walks three squares and returns in three moves while the enemy king can only manage two, so the move passes back and zugzwang appears. The breakthrough is the pawn-storm version. With pawns on a5, b5, c5 against a7, b7, c7, the shot 1.b6 (white's b-pawn pushes one square to b6) cracks the wall: 1...cxb6 (the c7 pawn captures on b6), then the a-pawn takes its turn to push and Black is forced to capture again, clearing the file so 3.c6 (the c-pawn now runs to c6) sends a passer through. If Black instead grabs with the a-pawn on the first move, White answers c6 with the same idea on the far wing. When you see three pawns against three on the same files, check for that sacrifice before anything else.
Pawn endgame chess puzzles: setting the slider where rook-pawn traps start to bite
The rating slider runs from about 400 to 2400 and stays tuned near a 75 to 80 percent solve rate, so set it where you fail roughly one position in four and the rook-pawn traps start showing up. That exception is the one worth practicing on purpose: with an a- or h-pawn the defending king draws by shuffling in the corner even when the winning conditions look met, because the opposition cannot drive it out. The first time I trusted the key-square checklist over raw counting, those drawn rook-pawn endings stopped slipping away.
Three hints wait on every position if you stall. The first names the motif so you know whether to look for opposition, a breakthrough, or a rook-pawn draw; the second points to the piece, the third gives the move to move. Take the motif hint first and try to finish the line yourself, since the calculation is where the pattern sticks. Each position is real and computer-verified, pulled from real games, so the wins and draws you find hold up against an engine.