
 By

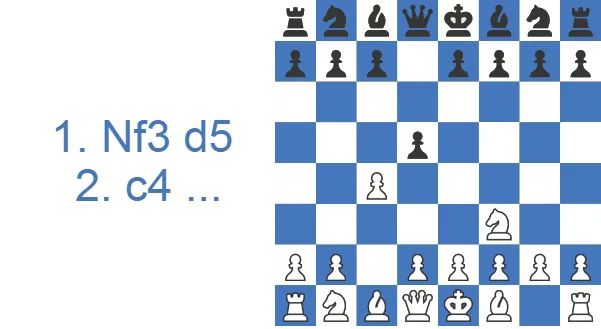
The Reti is not the most popular first move, but plenty of elite players have leaned on it. It was brought to the master level in the early 1900s by Richard Réti, and it remains a fighting choice with both strategic and tactical sides. One of its best features is flexibility: it can slide into many c4 and d4 lines depending on how Black reacts.
What Is the Reti Opening? A One-Line Definition
The Reti Opening is a flank opening that begins 1.Nf3 d5 2.c4. White deliberately holds back from occupying the center with pawns and pressures it from the wings instead, using c4, b3, a kingside fianchetto (g3 and Bg2), and frequently a second fianchetto on b2. The entry point is just 1.Nf3, the most flexible first move in chess. It develops a piece, controls e5, and commits to nothing. White usually follows with 2.c4 and Bg2, but can also steer toward a King's Indian Attack with an early d3 and e4. If you remember one skeleton, make it Nf3, c4, g3, Bg2, O-O, b3, Bb2, then pile pressure on d5 along the long light-squared diagonal.
Study the Reti Opening as White or Black
Both sides of the Reti Opening are really arguing about d5: White attacks it from the flank with 1.Nf3 and 2.c4, and Black chooses whether to hold, push, or trade it.
Take the White Side of the Reti Opening
White handles the Reti Opening as a siege of d5: the c4-pawn and g2-bishop press from a distance before the center gets touched. Read the long-range control ideas first, trace how the variations split, and then see the plan executed in the annotated Agincourt game.
Answering the Reti as Black
Pick the Reti Opening counter that suits your taste: cramp White with the space-grabbing 2...d4 push, or offer a Queen's Gambit with 2...e6 and solid development. Together with three dependable defensive ideas, those chapters answer how to face the Reti Opening at every rating.
The Reti in 60 Seconds
The Reti starts with 1.Nf3, usually followed by 2.c4 and a kingside fianchetto. Instead of grabbing the center with pawns, White attacks it from the flanks. It is a hypermodern setup that invites Black to overextend, then strikes back with c4, b3 and the long-diagonal bishop on g2.
- Main idea for White: control the center from a distance, trade off Black's space, and outplay him in the endgame.
- Reti Gambit: after 1.Nf3 d5 2.c4, the pawn is only a temporary offer. Black rarely keeps it safely.
- Best responses for Black: hold the center with 2...e6 or 2...c6, or grab space with 2...d4.
- Worst mistake: clinging to the extra c4-pawn. It usually drops back with interest.
If you only remember one plan, make it this: Nf3, c4, g3, Bg2, O-O, b3, Bb2, then pressure d5.
Watch: A 1.Nf3 Game Walkthrough
If you prefer to see the ideas in motion first, the video below walks through a full Reti game with commentary.
The video is just the start. Below it you will find in-depth analysis, the main transpositions, and practical tips for playing the Reti.
The master-game and amateur-game numbers below give a quick sense of how the opening scores in practice.
Master Games Statistics
Statistics from 6 Million Amateur Games
Key Ideas of the Reti: Control the Center From Afar
The Reti lets White attack Black's established pawns with the flank pawns rather than confronting them head-on. By inviting Black to advance in the center, White prepares to strike back with the e-pawn and the b-pawn and to take a firm central foothold of his own. Black can stay solid and avoid complications, or accept the invitation, which often leads to sharper play. Because the opening can transpose into closed systems such as the English, both players need to understand the related setups and judge when one is better than another.
History and Origin: Réti, Capablanca, and the Hypermodern Revolution
The Reti grew out of the 1920s hypermodern school, which argued that the center could be controlled from a distance rather than occupied outright. Richard Réti was its most famous champion. The opening's defining moment came at New York 1924, when he beat José Raúl Capablanca and ended the Cuban's eight-year unbeaten run. Capablanca overextended in the center exactly as the hypermodernists predicted he might, and Réti's flank pawns and fianchettoed bishop slowly took the position apart. That one game did more to legitimize 1.Nf3 with c4 and g3 than any amount of analysis. Almost a century later the ideas are mainstream: the fianchetto, the c4 lever, and the patient squeeze that turns a small structural edge into an endgame win.
Reti Opening Theory: How the Main Variations Branch
The Reti Gambit often leads to open positions where White cashes in on a development lead. White can end up with an isolated d-pawn, and Black usually tries to make a target of it.
The Advance Variation, where Black pushes 2...d4, leads to positions where White hits that advanced pawn with the flank pawns to undermine Black's center. These lines can turn tactical.
The quieter replies 2...e6 and 2...c6 defend the d5-pawn without overextending. Here Black aims for a sound, well-supported structure.
Reti Gambit Accepted: 2...dxc4
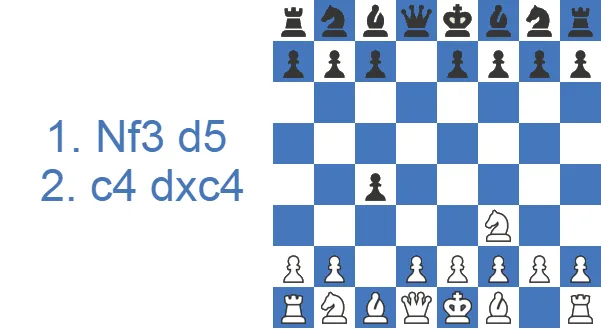
This line arises after Black accepts the offered pawn with 2...dxc4. By taking it, Black hopes to equalize quickly and castle. White, in return, gets quick development and active piece play that disrupts Black's coordination.
After 2...dxc4, White has a few options. The most common is 3.e3, which opens the f1-bishop's path to recapture on c4 and prepares short castling. White can also grab the pawn at once with Qa4+ followed by Qxc4.
Once e3 is played, Black can develop the knight naturally with 3...Nf6. White then recaptures the pawn with 4.Bxc4 and prepares to castle, usually intending d4 to claim the center. Black often answers with ...c5 to saddle White with an isolated d-pawn.
A typical continuation is 3...Nf6 4.Bxc4 e6, opening the dark-squared bishop's path to castling. White castles and plays d4 with 5.O-O and 6.d4. Black, meanwhile, may strike with 5...c5 and capture on d4 (6...cxd4) to leave White with the isolated pawn. After 7.exd4 Black continues developing on the queenside with 7...Nc6. White brings the knight out with 8.Nc3, eyeing a later d5 break. Black plays 8...Be7 to prepare kingside castling, and White creates a retreat for the c4-bishop with 9.a3 (otherwise ...Na5 would harass it; a3 reserves a2). After 9...O-O, White can put the f1-rook on the open e-file with 10.Re1.
From there, Black wants to fianchetto the c8-bishop with ...b6 and ...Bb7, while White looks for the right moment to play d5 and seize the initiative. These positions favor White when the d5 break lands at the correct time. In the longer run, though, the isolated d-pawn can become a real weakness if Black builds a proper blockade. A well-supported knight on d5 is Black's dream.
Advance Variation: 2...d4 (Black Grabs Space)
This variation arises after 2...d4. Black wants to keep a grip on the center, while White looks to chip away at it with the flank pawns. The sharpest try is 3.b4, leading to a dynamic game. White can also choose the calmer 3.g3, fianchettoing the bishop and playing positionally, but since that allows an easy ...c5, the concrete lines below focus on the more dynamic 3.b4.
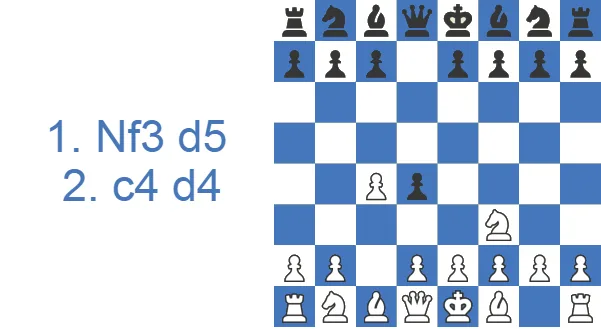
After 3.b4, the d4-pawn is surrounded by White's pawns. White wants the typical e3 break to attack it; after a later dxe3 and fxe3 followed by d4, White gets a strong center. So Black usually plays 3...c5 to decline that idea. White can play 3.e3 anyway to undermine the center. Then Black can take with 4...dxe3, and after 5.fxe3 (preparing d4 next move), Black plays 5...cxb4, claiming an extra pawn. Black is indeed up a pawn here, but White has full compensation in the form of a big space advantage and central control.
Instead of 4...dxe3, Black can also try 4...b6 to bolster the c5-pawn. This is common at the club level but is considered dubious because of a concrete sequence. After 4...b6, White can capture with 5.bxc5, and after 5...bxc5 the active 6.Ne5 exploits the weak light squares on Black's queenside. Black tries 6...Bb7, but 7.Qa4+ forces a block such as 7...Nd7. White then takes on d4 (8.exd4 cxd4) and plays 9.c5, opening the a4-e8 diagonal for the f1-bishop. The queen on a4 hits d4, and the bishop is heading for b5.
In the 4...dxe3 line, after 5.fxe3 cxb4, White has a strong center and open files on the queenside. White establishes the pawn with 6.d4, and after a developing move like 6...Nf6, plays 7.Bd3 to prepare short castling. Black usually fianchettoes with ...g6 and ...Bg7, while White presses with a3 (8.a3 bxa3 9.Bxa3) and castles. The plan is to put the rooks on the a- and b-files, roll the central pawns, and kick Black's pieces off their best squares.
In most cases Black aims for a solid position and an endgame, while White usually must keep pressing to justify the sacrificed pawn in these dynamic gambit lines.
Reti Gambit Declined: 2...e6 and 2...c6
Most club players do not take on c4; they decline. The two main ways are 2...e6 and 2...c6, both keeping the d5-pawn defended. After 2...e6, if White later plays d4 the game can transpose into Queen's Gambit territory, which is why this line is sometimes called the Queen's Gambit Invitation.
After 2...c6 you get a reversed Slav structure where White's extra tempo rarely amounts to much. Declining is safe, but it hands White exactly the slow, maneuvering game the Reti is designed for, so be ready to play patiently.
Agincourt Defense (2...e6): The Queen's Gambit Invitation
This line begins with 2...e6, guarding the d-pawn and aiming for a solid structure with central control. White has two common approaches. The first is 3.cxd5, and after 3...exd5, to plant the pawn with 4.d4, producing an asymmetrical structure. The more flexible alternative is 3.g3, fianchettoing the bishop to g2.
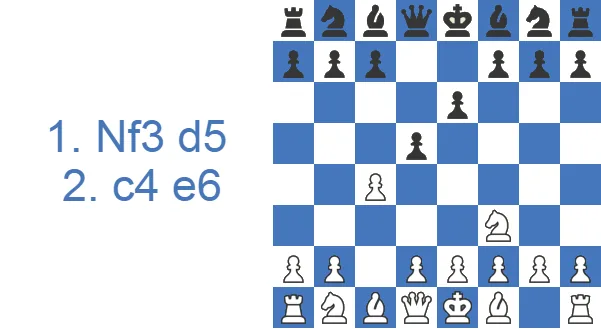
A sample line after 3.cxd5 exd5 runs 4.d4 c6 (Black builds a pawn chain and pressures the semi-open e-file). White develops with 5.Nc3, and after 5...Nf6, pins with 6.Bg5. Black breaks the pin with 6...Be7, and White solidifies with 7.e3, which also frees the light-squared bishop for castling. Black castles with 7...O-O, White develops with 8.Bd3, and Black pins the knight with 8...Bg4. White tries to break the pin with 9.h3; after 9...Bh5 keeps the bishop on the diagonal, White can let Black take on f3, accepting doubled kingside pawns in exchange for the open g-file. White usually castles queenside here to keep the king safe. After 10...Bxf3, White recaptures with 11.gxf3.
From there, White can castle short and follow up with h4 and Rdg1 to launch a kingside attack, while Black tries to blunt it and push the a- and b-pawns to counter on the queenside.
A sample line with 3.g3 runs 3...Nf6 (developing the knight), 4.Bg2 (preparing to castle), 4...Be7 (the same idea), 5.O-O O-O, and 6.d4. Here Black can take with 6...dxc4, and White hits the pawn with 7.Qc2. Black tries 7...a6, intending ...b5 to hold the extra pawn, but White prevents it with 8.a4. After 8...Bd7 (heading for c6 to challenge the strong g2-bishop), White regains the pawn with 9.Qxc4.
These positions can be very strategic: White presses along the c-file while Black tries to exploit White's backward e-pawn by blockading the e4-square.
Caro-Kann Formation: 2...c6 (Reversed Slav Structure)
This line begins with the quiet 2...c6. It often transposes to a Slav Defense, since Black wants a flexible but solid structure with pawns on c6 and d5.
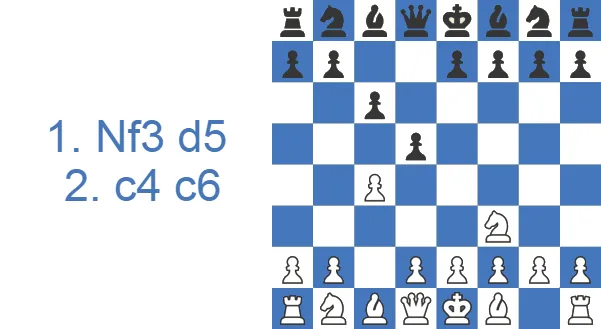
Both popular continuations, 3.d4 and 3.cxd5, head into Slav structures. There Black wants to develop the c8-bishop outside the pawn chain, while White eyes the b7-pawn with ideas like Qb3.
If White plays 3.e3, Black replies 3...Nf6. After the natural 4.d4, the game again resembles a Slav. Here Black plays 4...Bf5, and after 5.Qb3 (threatening Qxb7), Black meets it with 5...Qb6. Note that capturing on b6 to double Black's pawns is often bad for White because of the semi-open file it hands Black: the b4-square becomes hard to cover, and tactics on c2 appear, with the f5-bishop and a knight landing on b4.
White can keep developing naturally with Nc3, Be2 and castling. These games tend to be highly strategic.
Reti vs. English vs. Catalan vs. KIA: Which 1.Nf3 System Are You Actually In?
The best practical feature of 1.Nf3 is transposition, and the biggest practical danger is not knowing which opening you have landed in. Play c4 and g3 and meet ...e6 with an early d4, and you are in a Catalan. Delay or skip d4 while keeping c4 and Bg2, and the game leans toward a pure Reti or English Opening, especially after 1...c5 or 1...e5. Choose d3 and e4 with Bg2 instead, and you have a King's Indian Attack, a reversed King's Indian where White holds an extra tempo. Against ...c6 you reach a reversed Slav. Against an early ...c5 and ...e6 wall, a Queen's Gambit Declined structure can appear with colors reversed. So pick your central break on purpose (c4 alone, c4 plus d4, or d3 plus e4), because that one choice decides the whole middlegame.
How to Counter the Reti as Black: Three Reliable Ideas
The Reti looks quiet, but it is built to provoke you. White wants you to grab the center, then chips away at it with c4, b3 and the g2-bishop. The good news is that you do not need a wall of theory to be fine against it. You need three reliable ideas.
1. Hold the center, and don't get greedy. After 1.Nf3 d5 2.c4, the simplest equalizer is 2...e6 or 2...c6, keeping the d5-pawn supported. Develop your light-squared bishop before you lock it in with ...e6; that bishop is the one Black piece the Reti loves to bury. A clean setup is 1.Nf3 d5 2.c4 c6 3.b3 Bf5 4.Bb2 e6 5.g3 Nf6 6.Bg2 Nbd7 7.O-O h6 8.Nc3 Bd6, leaving Black solid with the bishop already outside the chain.
2. Take space if White lets you. Pushing 2...d4 grabs the center and cramps White's natural setup. It is not a refutation, but it sidesteps a lot of preparation and forces White to prove the gambit idea.
3. Don't try to keep the gambit pawn. After 2...dxc4, hanging on with ...b5 is exactly what White hopes for. Take the pawn, then give it back for easy development. The Reti Gambit is a tempo trap, not a free pawn. Against the double fianchetto, a clean reversed-Slav setup with ...c6, ...Bf5, ...e6, ...Nbd7 and ...h6 leaves Black solid, with no weaknesses to attack.
Named Black Defenses: Lasker System, ...Bg4, and the Tarrasch Structure
Beyond the simple ...e6 and ...c6 setups, three named Black plans are worth knowing. The Lasker System (also called Lasker's New York System) answers the double fianchetto with a solid wall of ...d5, ...c6, and ...Bf5 or ...Bg4, getting the light-squared bishop outside the pawn chain before ...e6 locks it in. The ...Bg4 plan pins the f3-knight, the very piece that props up White's central squares, and often invites doubled f-pawns after ...Bxf3, gxf3 in return for the bishop pair and an open g-file. The Tarrasch Defense structure (an early ...c5 next to ...d5 and ...e6) lets Black claim equal central space and accept an isolated queen's pawn in exchange for free piece activity. Among these plans, ...Bg4 is the one I keep running into, and the one that gives a Reti player the most trouble over the board. Each of the three is a well-mapped equalizer, not a one-off trick.
Common Reti Traps to Avoid as Black
One line punishes careless early development. After 1.Nf3 d5 2.c4 Nf6 3.g3 Bf5, the bishop looks well placed, but 4.cxd5 Nxd5 walks into 5.e4, forking the f5-bishop and the d5-knight at once. After 5...Bxe4, White plays 6.Qa4+ and scoops up the loose e4-bishop, winning a clean piece. The fix is easy. Recapture on d5 with the queen rather than the knight, or hold the tension instead of letting the d5-square turn into a target. It is a small line, but it shows a broader Reti theme: overcommitting a piece into White's long-diagonal influence is exactly what the opening is built to punish.
Named Variations of the Reti at a Glance (Quick Reference)
The table below collects the named lines you are most likely to meet, with the moves that define each.
| Name | Moves | Idea in one line |
|---|---|---|
| Reti Gambit Accepted | 1.Nf3 d5 2.c4 dxc4 | White gives a pawn for fast development |
| Advance Variation | 1.Nf3 d5 2.c4 d4 | Black grabs central space |
| Queen’s Gambit Invitation | 1.Nf3 d5 2.c4 e6 | Can transpose to a QGD |
| Slav Invitation | 1.Nf3 d5 2.c4 c6 | Reversed Slav structure |
| Sicilian Invitation | 1.Nf3 c5 | Reversed Sicilian flavor |
| Pirc Invitation | 1.Nf3 d6 | Black heads for a flexible …g6 setup |
| Tennison Gambit | 1.Nf3 d5 2.e4 | Sharp, offbeat pawn sacrifice |
If you only learn the first three, you will recognize the vast majority of what you meet over the board.
Test Yourself: Five Reti Positions
Make the move on the board. Hint gives you a nudge, Answer shows the move and why it works.
Reversed Slav structure. Black's bishop is out on f5. Which queen move attacks the undefended b7-pawn?
Black's d5-knight and f5-bishop stand side by side. Which central pawn move attacks both pieces at once?
Black wants to leave White with an isolated d-pawn. Which pawn move prepares ...cxd4 after d4?
The rooks face each other on the open a-file, and it is White's move. Which capture wins a rook?
White gave up a pawn for open lines. Which central pawn move grabs space and frees the c1-bishop?
Black's ...b6 weakened the light squares on the queenside. Which queen check exploits it?
White's queen came to c2 to win back the c4-pawn. Which pawn move prepares ...b5 to hold the extra pawn?
White stopped ...b5 with a4. Which bishop move heads for c6 to challenge the strong g2-bishop?
The h3-pawn attacks the g4-bishop. Which retreat keeps the pin on the f3-knight?
Black's b8-knight is the last minor piece at home. Which development move also defends the f6-knight, which the g5-bishop eyes?
Should You Play the Reti? Honest Strengths and Drawbacks
Pros
- White can establish a strong center in some positions.
- Some dynamic lines can help players to improve their tactical skills.
- Players can surprise their opponents with this line.
- The opening often gives unbalanced scenes and opportunities for both sides.
Cons
- As a hypermodern opening, White might suffer from a lack of space in some positions.
- Reti Opening may require a high level of positional understanding in certain scenes.
- It requires deep study for all the possible replies by Black.
- Black can stay solid and keep the game in a controlled zone.
Where to Study the Reti Next
A few resources stand out if you want to go further. For the historical and conceptual foundation, Réti's own writings and any good collection of New York 1924 games show the hypermodern plans in their original form. For a modern repertoire, video courses and database work on the games of Vladimir Kramnik and Peter Svidler, both committed 1.Nf3 players, show how the squeeze works against strong defense today. The most useful study habit is structural. Play through complete Reti games rather than memorizing move orders, and watch for the moment White finally commits to d4 or e4. Understanding that timing is worth more than any single variation.
Case Study: A Model Agincourt Attack
This illustrative game shows the Agincourt Defense (2...e6) turning into a kingside attack after Black takes on f3. It is a model line rather than a played game, but every move carries a practical lesson.
The early 3.cxd5 exd5 4.d4 sets the structural tone. White trades off the c-pawn to fix Black's pawn on d5, then plants a pawn on d4. The resulting Carlsbad-type structure is the heart of this line: White will play on one wing, Black on the other.
Moves 5 to 9 are pure development. 5.Nc3 and 6.Bg5 pin the f6-knight, 6...Be7 breaks the pin, and 7.e3 frees the light-squared bishop. The key decision comes with 8...Bg4, pinning the f3-knight. That knight guards e5 and supports any future e-pawn or central play, so pinning it is a logical try, but it also hands White a target.
The turning point is 10.Qc2 Bxf3 11.gxf3. Black voluntarily trades a good bishop for the knight, accepting that he has saddled White with doubled f-pawns. In return White gets exactly what he wants: the half-open g-file and a ready-made attacking lever. This is the practical lesson for a club player. Doubled pawns are not automatically bad. Here they hand White an open file aimed straight at Black's king, and the f3-pawn even helps control e4.
From move 12 White plays for the attack with a plan you can copy move for move: 12.O-O and 13.Kh1 tuck the king into the corner off the open g-file, 14.h4 prepares to open lines, and 15.Rg1 stacks the heavy pieces on g. Black, meanwhile, counters in the center and on the queenside with 13...a6 and 14...c5. The takeaway: once you accept doubled g-/f-pawns for the open file, do not drift. Commit to the attack, get the king safe first, then bring the rooks to the g-file before Black's queenside play arrives. The side that strikes first usually decides this race.
Final Thoughts on Adding the Reti to Your Repertoire
The Reti is a hypermodern opening where White counters in the center with the flank pawns. It produces rich positions with both strategic and tactical play, and both sides get genuine chances to outplay each other. Because of its positional, transpositional nature, it can flow into systems such as the English, so players should understand related openings and use those nuances over the board. If you enjoy slow squeezes and a flexible setup you can reuse against almost anything, the Reti earns its place in a repertoire.