
 By

Van't Kruijs Opening (1.e3) in 30 seconds
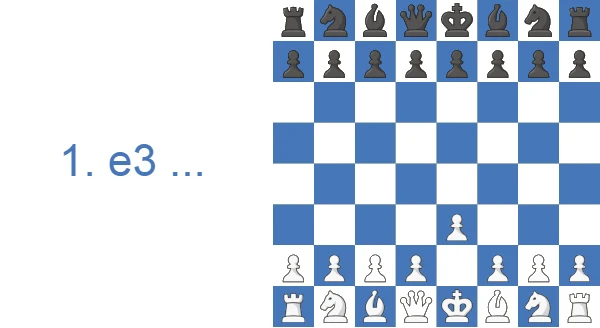
- The Van't Kruijs Opening is 1.e3 (ECO A00), also called the Pasadena Opening. It is named after the Dutch master Maarten van 't Kruijs (1813–1885).
- It is passive but solid. White does not fight for the center on move one and instead keeps every plan open, usually transposing: 2.d4 heads for Queen's Pawn structures, 2.c4 into the English, 2.b3 into a Larsen setup.
- Playing White? Free the c1-bishop early (with b3 and Bb2, or d4 and Bd2), and let Black overextend in the center so you can hit it later with c4 or f4.
- Playing Black? Don't be intimidated. Take the center with 1...e5 or 1...d5, develop naturally, and you equalize comfortably, since White has spent a tempo on a modest move.
- Bottom line: harmless if you know the plan, but a useful surprise weapon that drags well-prepared opponents out of their theory.
Study the Van't Kruijs Opening as White or Black
The Van't Kruijs Opening starts with the modest 1.e3, a move that commits White to almost nothing and offers Black a free swing at the center.
White's Plan in the Van't Kruijs Opening
Treat the Van't Kruijs Opening as a transpositional tool and pick your target structure early. The quick overview below covers White's setups in half a minute, the statistics section explains why 1.e3 holds up at club level despite ugly master numbers, and the survey of Black's three main plans tells you exactly what you need to be ready for.
How to Counter 1.e3 as Black
Facing the Van't Kruijs Opening mostly means grabbing the central space White just declined. Below you will find Black's strongest replies compared move by move, plus a straightforward Van't Kruijs counter built on claiming the center and developing before White finishes deciding what to play.
Why the Numbers Lie: Masters vs. Club Play
The two statistics tables tell completely different stories, and the gap is the most useful thing on this page. In master games White scores only 32% with a 30% draw rate, because strong opponents equalize against 1.e3 without effort and treat it purely as a transpositional tool. Drop to the 95-million-game amateur pool and the draw rate collapses to 4% while Black wins 49%. That is not because 1.e3 is good. It is because below roughly 1600 nobody draws anything, and games are decided by blunders rather than theory. So the Van't Kruijs is really a rating-band choice. It has almost no independent value at master level, yet it stays playable for club and online games, exactly where its one real trap does its damage.
Here are the raw results those conclusions come from. Master games first:
| Results | Rate |
|---|---|
| Victory for White | 32% |
| Draw | 30% |
| Victory for Black | 38% |
And the same opening across 95 million amateur games:
| Rating level (Lichess) | White wins | Draw | Black wins |
|---|---|---|---|
| 800, beginner | 46.8% | 5.2% | 48.0% |
| 1000, novice | 46.7% | 4.4% | 48.8% |
| 1200, improver | 46.6% | 4.1% | 49.4% |
| 1600, club | 46.4% | 4.0% | 49.6% |
| 1800, club | 46.7% | 4.4% | 48.9% |
| 2000, advanced club | 46.5% | 5.0% | 48.4% |
Source: Lichess opening explorer, blitz, rapid and classical games at the position after 1.e3. Figures are win rates by Lichess rating band; draws are rare at these levels.
Performance by Rating Level: Where 1.e3 Actually Works
Because 1.e3 carries so little forcing theory, its results swing hard with rating. Among titled and master players it is a rarity, used only to dodge an opponent's preparation, and its theory adherence is close to zero. There is no main line to memorize, just a cluster of transpositions into Colle and Queen's Gambit Declined structures. In the 1000 to 1800 band the picture flips. Move diversity is huge, both sides leave book on move two, and the player with the better feel for pawn structure and pawn breaks outplays the other. This is the reality behind the trap hook below. The Bb5+ queen-winning idea is a real threat almost only under about 1600, where an opponent will happily grab a pawn with a pinned defender. Above that level, treat 1.e3 as a quiet transposition, not a trick.
Time-Control Patterns: A Blitz and Bullet Surprise Weapon
The Van't Kruijs shows up far more in fast time controls. In classical chess Black has all the time needed to take the center with 1...d5 or 1...e5 and convert the free tempo, so 1.e3 rarely appears. Blitz and bullet change the maths. White reaches a comfortable, low-theory middlegame at once, while a surprised opponent burns clock deciding how to punish a move that looks like a beginner's mistake. The same flexibility that makes 1.e3 toothless against preparation turns into an asset when there is no time to prepare. If you want an online try that sidesteps an opponent's pet defenses, 1.e3 belongs in your fast-pool repertoire far more than in your classical one. The queen trap, which depends on a careless tempo-grab, fires most often when the clock is short.
A Short History: Maarten van 't Kruijs and the 1.e3 Name
The opening takes its name from Maarten van 't Kruijs (1813 to 1885), a Dutch master and several-time Amsterdam champion who used the modest 1.e3 in an era when 1.e4 was nearly universal. The move belongs to the small family of irregular first moves grouped under ECO A00, and it turns up in older sources as the Pasadena Opening. The related line 1.e3 e5 2.c4 even carries its own label, the Amsterdam Attack, a nod to van 't Kruijs's home city. The opening has never been fashionable at the top, but it sees quiet revivals whenever strong players want a transpositional sidestep. Modern grandmasters still wheel it out now and then to drag a well-booked opponent out of theory on move one.
Watch the Van't Kruijs in Action
For a quick visual walkthrough of these ideas, our five-minute video runs through 1.e3 and its main transpositions before you read the move-by-move detail below.
What 1.e3 Is Really Trying to Do
The whole point of 1.e3 is to stay flexible and see what Black commits to first. Depending on the reply, White picks the setup and the pawn structure they want. It is an admittedly passive move, since it does nothing for the center, but it transposes readily: games can drift into Queen's Gambit or Caro-Kann type structures if both sides cooperate. Black usually equalizes early, and the resulting positions tend to be quiet and positional, rewarding the side that understands the structure rather than the side that memorized a line.
Van't Kruijs Lines: Black's Best Responses (1...e5, 1...d5, 1...Nf6, 1...g6)
Against this flexible first move, Black has plenty of sensible replies.
The 1...e5 line often leads to equal games with symmetrical pawn structures.
The 1...d5 variation allows both tactical and positional play, and many setups are possible.
The 1...Nf6 line keeps Black flexible; games can stay hypermodern or transpose into the 1...e5 or 1...d5 territory.
The 1...g6 variation lets White grab the center, while Black strikes back after fianchettoing the bishop on g7.
The 1...e5 line
This occurs with 1...e5, the top choice among amateurs, claiming the center at once. White usually plays 2.d4, striking at the center. White can also take a different path with 2.c4, intending to stop Black's expansion in the middle of the board.
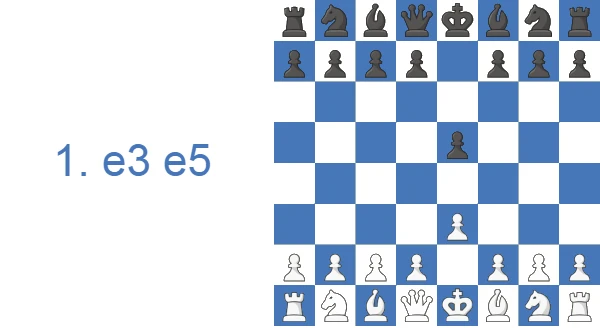
If White chooses 2.d4, Black usually captures with 2...exd4, and after White recaptures with the e-pawn (3.exd4), the structure becomes symmetrical with 3...d5. Both sides then develop normally, with little early dynamism.
One sample continuation runs 4.Nf3 (improving the knight) 4...Nf6 5.Bd3 (eyeing the b1-h7 diagonal) 5...Bd6 6.h3 (stopping ...Bg4) 6...O-O 7.O-O 7...Nbd7.
The resulting position is fairly equal, and both sides angle for the only open file, the e-file.
If White chooses 2.c4, Black usually keeps developing with 2...Nf6 (aiming to control the d5-square). These games are generally positional and can become closed once the e-pawns are fixed. Note that 1.e3 e5 2.c4 has its own name, the Amsterdam Attack.
A sample line from here runs 3.Nc3 (discouraging ...d5) 3...Bb4 (aiming to double White's pawns) 4.Nge2 (reinforcing the c3-knight) 4...O-O 5.a3 (kicking the bishop) 5...Be7 (retreating the bishop and denying White the bishop pair) 6.d4 exd4 7.Nxd4.
The resulting pawn structure is asymmetrical. White usually presses on the semi-open d-file, which favors them, while Black expands on the queenside or frees himself with ...d5.
The 1...d5 line
This line starts with 1...d5. One idea is to steer into a Queen's Gambit type of setup where the d-pawns become fixed once White plays 2.d4. White usually does play 2.d4 and aims for c4 next. Since nothing is tactically forcing for either side, White can pick from several setups.
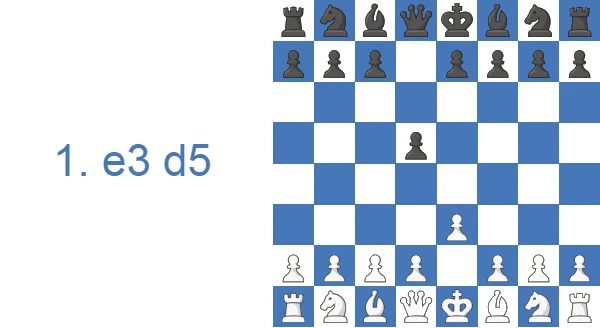
A sample line after 2.d4 runs 2...c5 (undermining White's center) 3.Nf3 cxd4 4.exd4. Once this position appears, the game resembles the exchange lines of the Caro-Kann Defense. Play can continue 4...Nc6 5.Bd3 Bg4 (pinning the f3-knight) 6.c3 (preventing ...Nxd4) 6...Qc7 (stopping Bf4) 7.Nbd2 e6 8.O-O Bd6 (eyeing ...Bxh2) 9.h3.
This position is open and ready for a fight. Black can castle queenside and storm the kingside with the f-, g- and h-pawns. Alternatively, Black can castle kingside and start a minority attack on the queenside with ...a6, ...b5, ...b4 to undermine White's pawns. White's plan depends on where Black's king goes: a4 is often a useful prophylactic measure against queenside castling. If Black castles long, White must act fast and push the a-, b- and c-pawns to open lines; if Black castles short, White typically targets the kingside with Re1, Ne5 and f4.
A sample line after 2...Nc6 runs 3.Nf3 (stopping ...e5) 3...Bg4 (pinning the f3-knight) 4.Be2 (breaking the pin) 4...Nf6 5.h3 (kicking the bishop) 5...Bxf3 6.Bxf3 6...e5. Here White should not grab the e-pawn but instead prepare a c4 break later. To do that, White castles short with 7.O-O, and after Black expands with 7...e4, White retreats the bishop with 8.Be2 and plays 9.c4. The overextended black pawns then become a liability, since the c6-knight is misplaced and cannot support the d5-pawn with ...c6.
The 1...Nf6 line
This line begins with the flexible 1...Nf6. Black shows nothing yet and keeps several plans available depending on White's second move. White usually plays d4 or goes for b3 and fianchettoes the f1-bishop on b2.
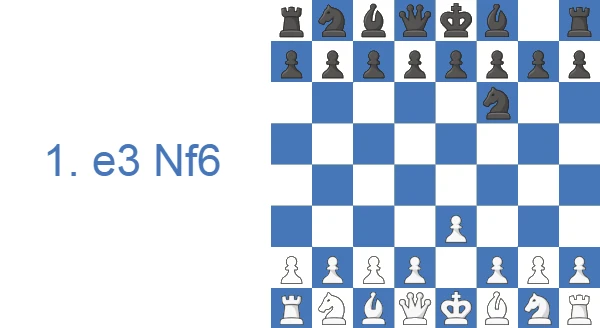
The 2.d4 lines resemble those above, since Black normally follows with ...Nf6, so here I will focus on the 2.b3 continuations.
After 2.b3, Black has many replies, but the main idea is to neutralize White's grip on the a1-h8 diagonal by fianchettoing on g7. The move 2...c5 is common, both stopping White's central expansion and clearing c6 for the b8-knight without blocking the c-pawn. One sample line runs 3.Bb2 g6 (heading for ...Bg7) 4.Nf3 Bg7 5.c4 (fixing the c-pawns to restrain Black's queenside) 5...Nc6 6.d4 (claiming firm control of the center) 6...cxd4 7.Nxd4 O-O 8.Be2.
The resulting position is full of options. Black can trade knights on d4, where White has several ways to recapture, and Black often plays ...d5 to open the c8-bishop's diagonal. Both sides must mind the a1-h8 diagonal, and the b2-bishop has to stay protected to avoid tactics along it.
The 1...g6 line
This line starts with 1...g6. As in the order above, Black plans to fianchetto the f8-bishop on g7.
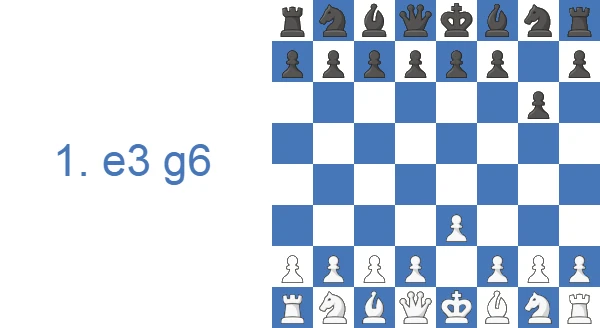
White typically plays 2.d4 to expand in the center. After 2...Bg7, White continues 3.c4.
Although Black has not put a pawn in the center, he is fine here, because this hypermodern setup lets him hit back at White's broad center. These games can resemble the King's Indian Defense, where Black plays ...d6 and then chooses the setup he wants.
A sample line after 3...Nf6 runs 4.Nf3 d6 (typical in this structure) 5.Nc3 O-O 6.Bd3 (rapid development) 6...Nbd7 (keeping options flexible) 7.Qc2 e5 8.O-O c6.
The resulting play depends heavily on the pawn structure. If the central pawns lock and the game closes, Black usually storms the kingside with ...f5-f4; that kind of position is tactical, and White must generate counterplay on the queenside. If the d4-pawn is traded for the e5-pawn, the game turns positional, and both sides maneuver toward the best squares and try to outplay each other slowly.
How to Counter the Van't Kruijs Opening as Black
Most players who look up the Van't Kruijs are actually sitting on the Black side, staring at 1.e3 and wondering what their opponent is up to. The good news is simple: because 1.e3 does nothing for the center, Black equalizes with any sensible plan and can often seize the initiative. There is no trick to fear on move one, only a tempo White has quietly given away.
Black has two clean recipes.
The solid counter: claim the center and develop
The most reliable approach is to occupy the center with a pawn and develop normally. A typical line runs 1.e3 d5 2.d4 Nf6 3.Nf3 e6 4.c4 c5.
The point is that White has reached a Queen's Gambit-type structure but spent two moves (e3, then d4) to do what 1.d4 does in one. Black, a tempo to the good, gets a comfortable game with easy development and no weaknesses. From here Black continues with ...Nc6, ...Be7 and ...O-O, and stands at least equal.
The ambitious counter: build a big pawn center
If White plays a quiet developing move instead of striking with d4, Black can be greedy. After 1.e3 e5 2.Nf3, the move 2...e4 kicks the knight and grabs space: 3.Nd4 d5. Black now owns the center with pawns on d5 and e4, while White's pieces are cramped behind the e3-pawn. White will try to undermine with 4.d3, but after 4...exd3 5.Bxd3 Black is fully developed and comfortable.
Black's Repertoire: Three Plans Against 1.e3
Rather than memorize variations, pick one of three plans and play it on autopilot. Plan A, the Classical grip, is the most reliable. Put a pawn on d5, follow with ...Nf6, ...e6 and ...c5, and you reach a Queen's Gambit-type structure where White has spent two moves (e3 then d4) to do a one-move job. You are a tempo up with easy development and no weaknesses. Plan B, the Hypermodern setup, suits fianchetto players. Meet White's center with ...g6 and ...Bg7, let White build with d4 and c4, then strike the center later with ...d5 or ...e5, much as in a King's Indian. Plan C, punishing the passive try, applies when White plays a quiet developing move instead of d4: take the big center. Whichever plan you choose, develop a piece every move, do not copy White's slow play, and watch the a1 to h8 diagonal if White goes for b3 and Bb2. A timely ...c5 and ...Nc6 keeps that diagonal controlled.
Punishing an Aggressive White: Gambit and Pawn-Storm Tries
Not every 1.e3 player stays quiet. Some follow up with an early f4 to grab kingside space, a Bird's Opening in disguise, or lunge with b4 gambit ideas to pry open lines. The antidote is the same composure that beats the quiet lines. Do not get greedy chasing material, and do not abandon your development to refute the gambit on the spot. Against an early f4, complete development and contest the center with ...d5 and ...c5 before you open the position. The f4-push weakens White's king, and a fully mobilised black army exploits that far better than a premature pawn-grab does. Against b4 ideas, decline what you do not need and let White's loosened queenside become a long-term target. Nearly every loss to these gambits I have seen came from someone who stopped developing to hold onto a pawn.
Black's Takeaways at a Glance
- Put a pawn on d5 or e5 (or both) early; that is the whole counter.
- Develop a piece every move; don't copy White's slow play.
- Watch the a1-h8 diagonal if White fianchettoes with b3 and Bb2; a timely ...c5 and ...Nc6 keeps it under control.
- Don't go hunting for a refutation. 1.e3 isn't refuted, it's simply outplayed by sound, active chess.
How I Answer 1.e3 in My Own Games
I had Black against 1.e3 here and I lost, which is why this one is worth showing. He played the slow setup, b3, Bb2, g3, Bg2, Ne2, and then simply took the center back with 9.c4 c5 and 11.d4. By that point it was an ordinary queen's pawn game and the label on the first move meant nothing.

My error came at 15...Nf6, after 14.d5 exd5 15.Nxd5. The engine moved from level to +2.1 for him. The trades followed by themselves, 16.Nxf6+ Bxf6 17.Qxd8 Bxd8, and his rooks reached the seventh with 21.Rd7 and 25.Rdd7. He did hand me a chance at 28.Kg2, from +2.0 to -0.9, and I did not take it.

So the honest pros and cons of 1.e3 are not about 1.e3. It concedes nothing and threatens nothing, it just delays the real opening. Take the center, watch for the d4-d5 break, and do not relax because the first move looked harmless.
Is the Van't Kruijs Opening Good? Honest Pros and Cons
Pros
- This opening is a good choice for players familiar with flexible opening .
- White can create many setups and learn many responses, depending on Black’s approach.
- The nature of the game often favors the better player due to the lack of tactical battles.
- Despite being unpopular, the first move does not give all the initiative to the opponent.
Cons
- 1.e3 is considered a passive move and does not contain an immediate ambition during the early stages of the game.
- Black can claim the center if White stays too passive.
- These games often require a deep understanding of positional play.
- Black equalizes right after White’s first move.
Van't Kruijs Traps: the Bb5+ Queen Trap
This trap begins after 1...d5. White plays 2.d4, Black replies 2...c5, and White then develops the knight to f3 with 3.Nf3. Exchanges follow on d4 with 3...cxd4 4.exd4. Black brings the knight out with 4...Nc6, White develops the bishop with 5.Bd3, and Black pins the f3-knight with 5...Bg4. Now White lays the trap and castles, 6.O-O. If Black grabs the d4-pawn with 6...Nxd4, White uncorks 7.Nxd4, offering the queen. After Black takes it with 7...Bxd1, the point arrives: 8.Bb5+ wins the black queen with a tempo, and after the check is met White scoops up the d1-bishop a clean piece ahead.
Test Yourself: Five Positions
Set up each position and find the best move. Use Hint for a nudge or Answer to reveal the engine’s top move.
Find the best move.
Find the best move.
Find the best move.
Find the best move.
Find the best move.
Where 1.e3 Sits Among the Quiet Openings
If you like the flexible, theory-light nature of the Van't Kruijs, these first moves share its spirit:
| Opening | First move | Idea in one line |
|---|---|---|
| Saragossa Opening | 1.c3 | Quiet prep for a later d4, even more modest than 1.e3. |
| Mieses Opening | 1.d3 | A King’s Indian Attack in reverse, keeping the c1-Bishop free. |
| Nimzowitsch–Larsen Attack | 1.b3 | Fianchetto first, fight for the long diagonal. |
| Bird s Opening | 1.f4 | The sharp cousin, grabs kingside space at once. |
Unlike these, the Van't Kruijs uniquely opens the f1-bishop on move one while leaving the c1-bishop to be solved later. That trade-off is exactly what you accept when you play 1.e3, and it makes the structure feel a lot like a French Defense played a tempo up, a reversed French where White is the one a move behind.
Case Study: A Caro-Kann-Type Middlegame from 1.e3 d5
The clearest way to see what 1.e3 actually becomes is to follow one of its most natural lines into a real middlegame. The line below is the 1...d5 main road from earlier in the article; I have chosen it because it shows the typical transposition into a Caro-Kann exchange structure and, more importantly, the plans that decide these games.
Here is what each phase teaches a club player.
- 1.e3 d5 2.d4: this is the whole story of the opening in two moves. White spends e3 and then d4 to reach a normal Queen's-Pawn center that 1.d4 would have built in one tempo. From move two onward the "Van't Kruijs" has effectively disappeared; you are playing a Queen's-Pawn middlegame.
- 2...c5 3.Nf3 cxd4 4.exd4: Black immediately challenges the center, and the recapture 4.exd4 leaves White with an isolated-looking d4-pawn supported by c3 later. This is the Caro-Kann exchange structure with colors and tempo reshuffled. The d4-pawn and the half-open files are the things both sides will fight over for the rest of the game.
- 5.Bd3 Bg4: White develops the bishop to its best diagonal; Black pins the f3-knight to add pressure on d4. This is also the exact moment where the famous queen trap lives. Note that White here plays the calm 6.c3 rather than castling into the trap line, because the pin is only dangerous if White lets ...Nxd4 work.
- 6.c3 Qc7: the small move 6.c3 props up d4 and rules out ...Nxd4 tricks for good. Black's 6...Qc7 is prophylaxis, eyeing the b8-h2 diagonal and discouraging Bf4. These are not flashy moves, but they are the kind of quiet, structure-first decisions that win these positions.
- 7.Nbd2 e6 8.O-O Bd6 9.h3: both sides finish development sensibly. White tucks the king away and plays h3 to question the g4-bishop; Black completes the harmonious ...e6 and ...Bd6 setup, lining the bishop and queen up against h2.
The turning point in games like this is not a tactic; it is the choice of where Black castles, because that single decision dictates everybody's plan. If Black castles queenside, White must race with a4 and a pawn storm on that flank. If Black castles kingside, White switches to Re1, Ne5 and f4 to attack the king instead.
The practical takeaway: the Van't Kruijs is not an opening you "win" in the opening. You win it by understanding the resulting pawn structure better than your opponent does. Learn the d4 isolated-pawn and Caro-Kann exchange motifs, decide your plan based on the kings, and the extra tempo Black earned at move one quietly turns into a real edge.