
 By

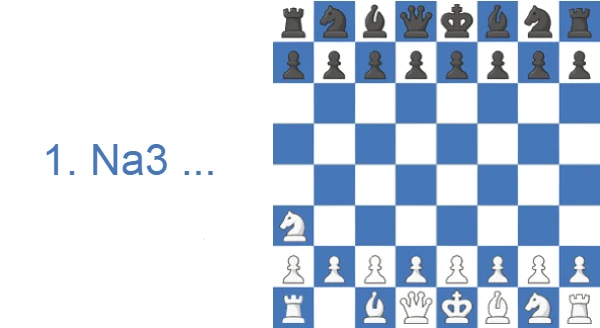
At master level the Sodium Attack is almost never seen, and for good reason. Club results are a different story: in the displayed 1800 and 2000 bands of the Lichess table below, White wins more often than it loses.
How 1.Na3 holds up in master games
Master games with 1.Na3 barely exist. Titled players have used it in well under 500 classical games across the entire recorded history of chess, and most of those were curiosities rather than serious attempts at an edge.
Study the Sodium Attack as White or Black
The Sodium Attack begins with the eccentric 1.Na3, and the whole game hinges on whether White gets the knight to c4 or Black shuts it out of play.
The Sodium Attack from White's Side
White's realistic aims in the Sodium Attack come down to the Nc4 reroute, hits on e5 and b6, and surprise value. The short verdict sets expectations, the key-ideas chapter shows what 1.Na3 is fishing for, and the theory section tests each setup against Black's best.
Refuting 1.Na3 as Black
The cleanest Sodium Attack counter is central and unhurried: claim d5 and e5, then let the a3-knight prove it belongs in the game. Between the move-by-move replies, the principled 1...d5 line, and the reversed-Benoni model game, you will know exactly how to face the Sodium Attack.
Amateur results on Lichess
The amateur numbers are blunt. Here is how 1.Na3 scores in the Lichess opening explorer below master level.
| Rating level (Lichess) | White wins | Draw | Black wins |
|---|---|---|---|
| 800, beginner | 37.1% | 7.9% | 55.0% |
| 1000, novice | 36.4% | 6.7% | 56.9% |
| 1200, improver | 33.9% | 6.7% | 59.4% |
| 1600, club | 43.5% | 4.5% | 52.1% |
| 1800, club | 53.7% | 3.6% | 42.7% |
| 2000, advanced club | 54.3% | 3.8% | 41.9% |
Source: Lichess opening explorer, blitz, rapid and classical games at the position after 1.Na3. Figures are win rates by Lichess rating band; draws are rare at these levels.
White wins 43%, draws 5%, and loses 52%, one of the only first moves with a losing record this bad.
Watch: a quick walkthrough of 1.Na3
If you prefer to see the ideas in motion, the video below runs through the main lines of the Sodium Attack.
Watched the video? Read on for the move-by-move explanations and practical examples.
The short answer on the Sodium Attack
Is the Sodium Attack a good opening? Not in any objective sense. The knight is misplaced on a3 and has to move again before it does anything useful, handing Black a free tempo and easy central control. At master level it goes unplayed. Below 1800, the Lichess explorer shows White scoring just 43%. It does have one practical use: if your opponent has never seen 1.Na3, they will burn clock figuring out what to do. In a fast time control, against an unprepared opponent, that alone can be worth trying.
Where the name comes from: Sodium, Durkin, and ECO A00
The two names point to the same move. 1.Na3 was popularized by American master Robert T. Durkin (1923-2014) of New Jersey, who wheeled it out for decades, so older literature calls it the Durkin Opening or Durkin's Attack. The catchier label arrived later. Chess writer Eric Schiller coined "Sodium Attack" in his 1998 book Unorthodox Chess Openings, riffing on the fact that the move "Na3" reads like Na, the chemical symbol for sodium on the periodic table. So Sodium Attack, Durkin Attack and Durkin Opening are interchangeable, and in opening encyclopedias the move lives under ECO code A00, the catch-all for irregular and uncommon first moves. If you are searching databases, expect to find it filed under Durkin more often than under its wittier alias.
Key ideas: what White is actually hoping for after 1.Na3
- Get the knight off a3. The knight cannot stay there. It heads to c4 (the natural square, hitting the e5-pawn), to c2 (a quiet retreat that supports a later d4), or in some lines to b5, jumping into Black's queenside. Either way it needs at least one more move just to join the game.
- Expand in the center with c4 or d4 once the knight has a path. Most sensible plans involve a quick 2.c4 to fight for the center and open a route to c4 for the a3-knight if Black trades there.
- Hope Black plays passively. The Sodium Attack only works against opponents who don't know how to punish the wasted tempo. If Black strikes in the center straight away, White is simply down a move.
Black's main replies to 1.Na3, move by move
Almost any sensible developing move equalizes, but four first moves stand out. 1...d5 is the most principled. It claims the center, stops e4 and dares the a3-knight to find a job. 1...e5 is just as good and more direct, planting a pawn in the middle and inviting White to chase it with the only useful knight move, 2.Nc4. 1...c5 is the practical reversed-Sicilian try, taking queenside space and often transposing into English-style structures where White's misplaced knight has simply cost a move. 1...g6 is the flexible fianchetto approach, preparing ...Bg7 and ...d5 and refusing to commit the center early. Whichever you pick, the theme stays the same. Occupy the center, develop naturally, and let White spend the tempo it takes to rescue the knight from the rim.
Sodium Attack Theory: Main Variations and How Black Refutes Them (the three main setups)
1...d5 Variation: Black's most principled response
Black's strongest reply is the simple central push 1...d5. It stops e4 at once, claims the center, and forces White to come up with a plan for the offside a3-knight.
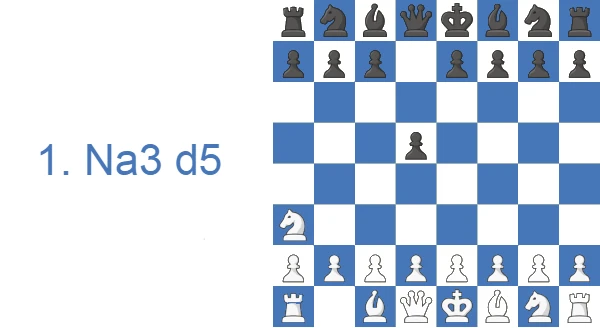
White's most natural follow-ups are 2.c4 (preparing 3.Nxc4 if Black captures), 2.d4 (grabbing the center despite the knight), or 2.b3 (preparing Bb2 to defend the knight on a3 indirectly). There is one tactical idea Black should know: the a3-knight can be captured by Black's dark-squared bishop, saddling White with doubled pawns on the a-file. After 1...d5 2.Nf3 e6, the f8-bishop is ready to take on a3 with 3...Bxa3.
After 4.bxa3, White has the bishop pair as compensation, but the doubled a-pawns are a permanent weakness, and Black is comfortably better in any endgame from this structure. White can try to make use of the long a1-h8 diagonal by parking the dark-squared bishop on b2, but at amateur level the structural damage usually outweighs the bishop pair. That is why most White players prefer 2.b3 (so the c1-bishop can defend a3 while keeping an eye on the long diagonal) or 2.c4 (which gives the knight a productive square). Both are covered below.
The ...Bxa3 idea: trading your bishop to wreck White's pawns
Here is the most instructive idea in the whole opening, and most club players never spot it. After 1.Na3 d5 2.Nf3 e6, Black's f8-bishop eyes a3, and 3...Bxa3 followed by 4.bxa3 hands White doubled, isolated a-pawns for the rest of the game. Your instinct screams to keep the bishop pair, but that instinct is wrong here. The offside knight was White's worst piece, and the doubled a-pawns stay weak in every endgame that follows. White's compensation is the half-open b-file and the bishop pair, yet at amateur level the damaged structure almost always outweighs it. A practical tip: under 1600, pre-commit to ...Bxa3 the moment the knight has no defender. Hesitation is exactly the surprise tax 1.Na3 is hoping to collect.
Line 1: 2.c4, the main try
After 1...d5 2.c4, White's idea is straightforward. If Black plays 2...dxc4, the a3-knight gets to recapture with 3.Nxc4. Now the knight is well placed, controlling e5 and d6, and the position takes on the feel of a reversed King's Indian Attack. White will follow up with d3, g3, Bg2, and short castling. The pawn structure is fine; the only real issue is that Black has had several easy developing moves.
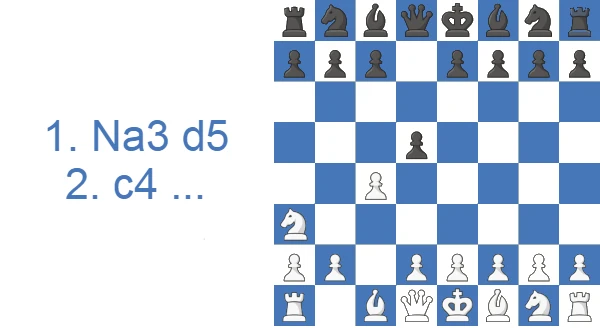
This is the line White is hoping for, and it is also the line stronger Black players avoid. Anyone over 1200 will recognize that capturing on c4 just helps White solve the knight problem. Better is 2...d4, locking the structure and entering a reversed Benoni. Black takes a big space advantage and White has to scramble for activity. A typical sequence:
Black has a clean setup: pawns on c5, d4, and e5 gripping the center, every minor piece developed, king safe. White has played quietly and needs a pawn break (a3-b4 or e3) to generate any play at all. Black is comfortably better.
Line 2: 2.b3 and 3.Bb2
White's other main try is 2.b3, preparing Bb2 to defend the knight indirectly.
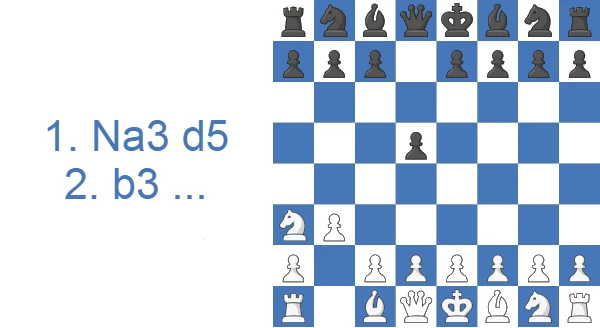
After 1...d5 2.b3 e5 3.Bb2, Black has chosen the most testing continuation: a strong central pawn duo and a bishop ready to drop to d6 or c5. If Black plays 3...Bd6 to defend the e5-pawn, White has the resource 4.Nb5, suddenly hitting d6 and threatening to win the bishop pair:
To sidestep the Nb5 idea, Black usually defends e5 with 3...Nc6 or 3...Nd7 instead. White then continues with e3, g3, Bg2, Nf3, and short castling, and eventually plays c4 to give the a3-knight a permanent home. Even with all that, Black is still slightly better. The knight rerouting cost too much time.
Can White actually make 1.Na3 work?
Yes, in the narrow sense that White rarely loses by force on move one. The whole plan hinges on the knight reaching c4, its only good square, where it eyes e5 and d6 and the position can resemble a reversed King's Indian Attack. White's best practical approach is to play for transposition rather than independent theory. 2.c4 can steer toward English structures, 2.b3 and Bb2 lean on the long diagonal, and 2.d4 simply grabs the center and treats Na3 as a quirky move order into a Queen's-Pawn setup. The ceiling is equality at best, since every line costs White the tempo of rerouting the knight. As a one-off surprise in fast time controls, against an opponent who has never met it, the clock they burn while puzzling it out is sometimes worth more than the half-pawn White concedes.
What the engine says about 1.Na3
Modern engines put a precise number on the intuition. From the starting position, Stockfish evaluates 1.Na3 at roughly -0.4 for White. Small in absolute terms, but a real surrender of the first-move advantage that usually has White around +0.2 to +0.3. That gap of more than half a pawn is the wasted tempo and ceded center, nothing more. After the ...Bxa3 structure (1.Na3 d5 2.Nf3 e6 3...Bxa3 4.bxa3), engines hold Black comfortably better, the doubled a-pawns counted as a lasting liability that the bishop pair only partly offsets. From my side of the board the position never feels lost for White, which is why the opening survives online, but the engine verdict stays consistent. 1.Na3 is dubious, not losing, and Black's edge is the structural and developmental kind that grows in an endgame rather than vanishing in tactics.
1...e5: aiming for the e-pawn
Black's other strong response is 1...e5, with a different idea: don't try to refute White's setup, just grab the center yourself. After 2.Nc4 (the only way to develop the misplaced knight), the knight attacks e5 and Black defends it with 2...Nc6. White's sharpest try is then 3.e4, grabbing central space and trying to stop ...d5.
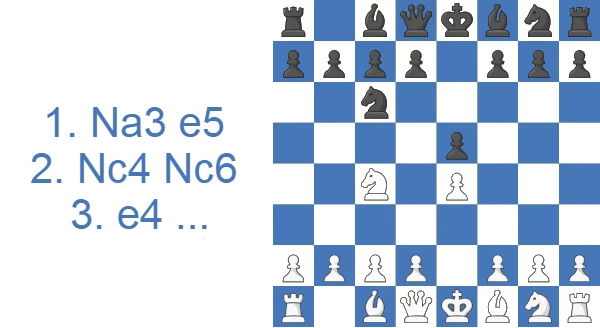
The problem: it doesn't actually stop ...d5.
After 4.exd5 Qxd5, Black has an active queen on d5, fully developed pieces, and equal space. White is slightly worse, partly from the lost tempo with Na3-Nc4, partly from the open e-file that White has no pieces ready to exploit. Most amateurs avoid this line because bringing the queen out so early feels risky, and that is the only reason White survives at club level.
If both sides play forcing moves, the game can get sharp:
This line has been analyzed by 1.Na3 enthusiasts: Black's queen gets harassed, White grabs the a8-rook with the knight on c7, but the knight then gets trapped on a8 in return. The end position is roughly material-equal, but Black's coordination is better, and engines call it slightly worse for White.
3...Nf6: the calmer Black response
More common in amateur play than 3...d5 is the quiet 3...Nf6, hitting the e4-pawn.
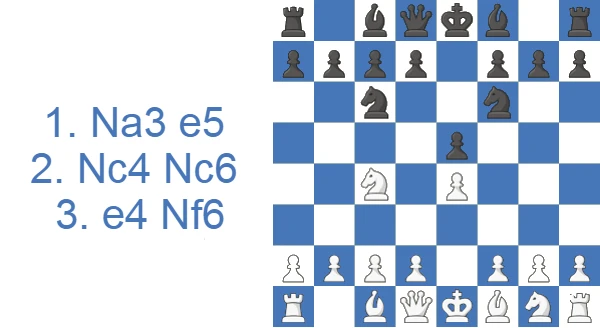
White defends with 4.d3, and now Black has a choice: 4...Bc5 (active development) or 4...d5 (transposing back to the d5 lines).
4...Bc5 leads to a tactical sequence White needs to know. After 5.Nf3, Black has 5...Ng4!, threatening f2:
If White defends f2 with 6.Be3, Black trades a pair of pieces and then plays ...d5 to break open the center. White's structure is wrecked: doubled e-pawns, an open f-file, weak dark squares. Black is much better. The improvement for White is 5.Be2 instead of 5.Nf3, sidestepping the Ng4 idea and developing the king's knight more carefully.
3...f5: the Durkin Gambit
The most ambitious Black try is 3...f5, hitting e4 directly with a pawn. This line has its own name, the Durkin Gambit, even though it is Black sacrificing material rather than White.
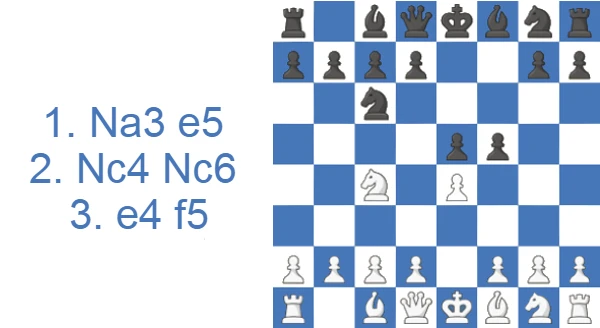
After 4.exf5 (White can also decline with 4.d3), the game turns sharp and tactical.
A typical line shows how dangerous it gets for White:
After 6...Nxh5, White recaptures the knight on h5 with 7.Qxh5+; the line shown continues instead with 6...Ke7. White then needs precise play to stay afloat, typically 7.Ne3 d4 8.Nf1 Bxf5 9.Ng3, slowly steering the c4-knight back to safety:
White is still worse: Black's king is exposed, but the extra central pawn and active pieces give full compensation, and it remains a real fight.
The one real Sodium Attack trap: the c4-pawn-grab White can still hope for
This trap shows up now and then in club blitz, after Black greedily grabs the c4-pawn:
After 5...Nbd7, the knight on e5 jumps to c6, forking the queen on d8.
Case Study: a model reversed-Benoni against 1.Na3
The cleanest illustration of why Black is comfortable here is the main 2...d4 line, played out to a finished opening with both sides castled. This is a model line rather than a famous game, but it shows exactly how a club player should handle 1.Na3 from the Black side.
What this line teaches, move by move:
- 1...d5: the principled center grab. Black answers an offside knight by occupying the squares the knight should be fighting for.
- 2.c4 d4: this is the key decision and the one most club players get wrong. The tempting 2...dxc4 lets White recapture with 3.Nxc4 and the rim knight suddenly lands on its best square. Instead Black pushes 2...d4, locking the center and refusing to hand White a favor. The knight on a3 still has nowhere good to go.
- 3.d3 c5 4.g3 e5: Black builds a Benoni-style pawn wedge on c5-d4-e5. With colors reversed and an extra tempo in hand, this is a structure where Black is the one pressing. Note that White's whole plan has shrunk to a quiet fianchetto setup because there is nothing more ambitious available.
- 5.Bg2 Nc6 6.Nf3 Nf6 7.O-O Bd6: both sides develop naturally, but look at the contrast. Every black piece points at the center and kingside; White is still untangling. The bishop on d6 guards e5 and eyes White's king.
- 8.Nc2 O-O: here is the turning point in plan, not in material. White finally admits the a3-knight was misplaced and reroutes it Na3-c2 to support a future e3 or b4 break. That is the tempo Black has been promised since move one. Black calmly castles into a position with more space, freer pieces, and a clear plan of ...a5, ...Re8 and a kingside expansion.
The practical takeaway for a club player is simple: against 1.Na3, do not get clever. Take the center with a pawn, decline the c4 capture so the knight stays bad, develop everything toward the middle, and let White spend moves fixing the problem they created on move one. You will reach a position like this one in almost every game, a small but durable edge that is easy to play and hard for White to shake off.
The one thing it's good for (and four reasons it isn't)
The honest balance sheet for 1.Na3 comes down to a single practical upside against a stack of structural downsides.
Pros (for White)
- Catches unprepared opponents off-guard, especially in fast time controls.
- No real theory to memorize, White just makes it up as they go.
- Some lines (e.g. after 3 d5) become genuinely chaotic and tactical.
Cons (for White)
- Black is objectively better with accurate play.
- White wastes at least one tempo rerouting the knight.
- Black gets easy central control in nearly every line.
- Violates basic opening principles.
Should you play the Sodium Attack (1.Na3)? A rating-by-rating answer
ChessDoctrine's honest recommendation, by rating range:
- Under 1200: Don't. You should be learning sound openings like 1.e4 or 1.d4. Building habits around an objectively bad opening will hold you back later.
- 1200-1600: Maybe once or twice as a curiosity, in casual blitz. Not as a regular weapon.
- 1600-2000: As a surprise in bullet, against opponents you have played before and know like to follow book moves. Don't bring it to a tournament.
- Over 2000: You already know the answer. The opening is unsound, and your opponents are too well prepared for the surprise value to matter.
Final thoughts on 1.Na3
The Sodium Attack is a bad opening with a great name. It breaks opening principles, gives Black easy equality at minimum and an edge with accurate play, and exists in modern chess mainly as a curiosity. But if you have ever wanted to play 1.Na3 just to see what happens, just to see whether your opponent gives you the look, the lines here will keep you afloat long enough to enjoy it.
Test Yourself: Sodium Attack Positions
Make the move on the board. Hint gives you a nudge, Answer shows the move and why it works.
1.Na3 d5 2.b3 e5. Nothing defends Black's e5-pawn. Which bishop move attacks it?
Black has pawns on c5 and d4. Which pawn move gives d4 a second pawn guard and grips the center?
Black pushed 3...e5 and nothing defends the pawn. Which capture takes it?
Black's b5-pawn attacks your c4-knight. Which jump reaches a safe central square where the knight also eyes f7?
Black struck with 3...d5, hitting your knight and your pawn. Which pawn capture takes the d5-pawn?
Your queen on d5 is attacked by the e3-knight. Which diagonal step back keeps it guarding e5?
Black's e4-pawn attacks your f3-knight. Which bishop move hits Black's queen on e6, with the e3-knight guarding the bishop?
Black's bishop already eyes f2. Which knight move adds a second attacker there without hanging the piece?
Black's knight on g4 and bishop on c5 both hit f2. Which bishop move defends it?
Durkin Gambit: 3...f5 hits your e4-pawn and offers a pawn. Which pawn capture takes it?